Description of this recipe: These air-fryer scones offer a faster, more convenient way to enjoy this quintessential baked good, delivering a perfectly golden-brown crust and a soft, fluffy interior in a fraction of the time compared to traditional oven baking. This recipe maintains the authentic flavor and texture of a classic scone while harnessing the efficiency of the air fryer.
Why you will love this recipe: You’ll adore these air-fryer scones for their speed, ease of preparation, and delightful results. The air fryer creates a wonderfully even bake, resulting in scones that are crisp on the outside and tender on the inside. This recipe is perfect for busy mornings, afternoon tea, or when you simply crave a warm, homemade treat without the hassle of a lengthy baking process. Plus, the air fryer uses less energy than a conventional oven, making it an eco-friendlier option.
Introduction
Scones, those delectable little mounds of baked goodness, have been a staple of British tea time for centuries. Traditionally baked in an oven, achieving the perfect scone – one that boasts a golden-brown exterior, a soft, crumbly interior, and that characteristic slight rise – can sometimes feel like an elusive art. But what if I told you there’s a way to simplify the process, making it faster, easier, and just as delicious? Enter the air fryer!
The air fryer, once relegated to the realm of crispy fries and perfectly cooked chicken wings, has proven its versatility time and again. Its ability to circulate hot air evenly and efficiently makes it an ideal tool for baking, and scones are no exception. This recipe leverages the air fryer’s capabilities to deliver consistently perfect scones with minimal effort. Forget preheating a massive oven and monitoring the bake for an extended period. With the air fryer, you can have warm, freshly baked scones on your table in under 20 minutes.
This recipe is designed for both novice and experienced bakers alike. We’ll walk you through each step, from combining the dry ingredients to achieving that perfect golden-brown hue in the air fryer. We’ll also share some tips and tricks to ensure your scones are always light, fluffy, and utterly irresistible. So, grab your apron, dust off your air fryer, and let’s embark on a journey to scone-baking perfection.
Ingredients:
- 175g self-raising flour, plus extra for dusting
- ½ tsp baking powder
- 50g cold unsalted butter, cut into small cubes
- 2 tbsp caster sugar
- ½ tsp vanilla extract
- 90ml buttermilk or milk (full fat is preferred)
- Milk, to glaze
- Jam and clotted cream, to serve
Preparation:
Step 1: Preheat your air fryer to 180°C (350°F). This step is crucial for ensuring even cooking and a perfectly golden-brown crust. While the air fryer is preheating, prepare your scone dough.
Step 2: In a large bowl, whisk together the self-raising flour and baking powder. Add a pinch of salt. The salt will enhance the flavor of the scone. Sifting the flour and baking powder ensures there are no lumps, resulting in a smoother dough.
Step 3: Add the cold, cubed butter to the flour mixture. Using your fingertips, rub the butter into the flour until the mixture resembles breadcrumbs. This is a critical step for creating the light, flaky texture characteristic of a good scone. Work quickly to prevent the butter from melting, as melted butter will result in a denser, less tender scone. You can also use a pastry cutter or a food processor for this step, but be careful not to over-process the mixture. If using a food processor, pulse the ingredients until just combined.
Step 4: Stir in the caster sugar. The sugar adds sweetness and contributes to the scone’s golden-brown color. Make sure it’s evenly distributed throughout the flour mixture.
Step 5: In a separate bowl or jug, whisk together the vanilla extract and buttermilk (or milk). Buttermilk adds a slight tang and richness to the scones, resulting in a more flavorful and tender crumb. If you don’t have buttermilk, you can make a quick substitute by adding 1 tablespoon of lemon juice or white vinegar to the milk and letting it sit for 5 minutes before using.
Step 6: Gradually add the wet ingredients to the dry ingredients, mixing until just combined. Be careful not to overmix the dough, as this will develop the gluten and result in tough scones. The dough should be slightly sticky but not overly wet. If the dough is too dry, add a little more milk, one tablespoon at a time, until it reaches the desired consistency.
Step 7: Lightly dust a clean work surface with flour. Turn the dough out onto the floured surface. Gently bring the dough together into a ball. Do not knead the dough. Kneading will develop the gluten too much, making the scones tough.
Step 8: Flatten the dough slightly until it’s about 4-5cm (1.5-2 inches) thick. Use a 5cm (2-inch) round cutter to cut out the scones. Press the cutter straight down and avoid twisting it, as this will seal the edges and prevent the scones from rising properly. Re-roll any leftover dough to cut out more scones.
Step 9: Place the scones in the air fryer basket, leaving some space between them to allow for even cooking. Avoid overcrowding the basket, as this will prevent the air from circulating properly and result in unevenly cooked scones. You may need to bake the scones in batches, depending on the size of your air fryer basket.
Step 10: Brush the tops of the scones lightly with milk. This will help them to brown beautifully in the air fryer.
Step 11: Bake for 14-18 minutes, or until the scones are golden brown and have risen nicely. The exact cooking time will vary depending on your air fryer, so keep a close eye on the scones and adjust the time accordingly.
COOKING Rating: Easy
Serving Suggestions:
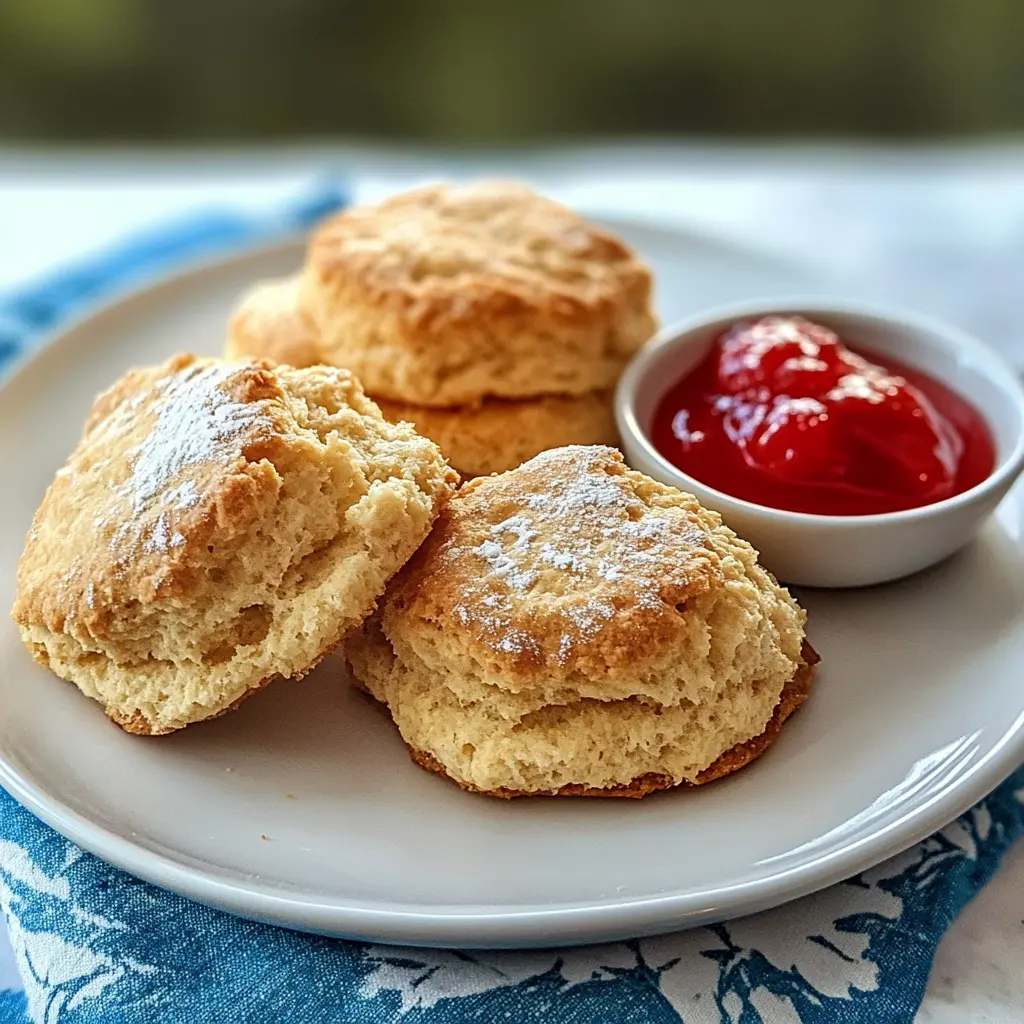
Serve warm with your favorite jam and a generous dollop of clotted cream. These scones are also delicious with lemon curd, fruit preserves, or even a simple pat of butter. They are perfect for afternoon tea, brunch, or a special breakfast treat. For an extra touch of elegance, dust the scones with powdered sugar before serving.
Tips:
- Use cold butter for the best results. Cold butter helps create a light and flaky texture.
- Don’t overmix the dough. Overmixing develops the gluten and results in tough scones.
- Handle the dough gently. The less you handle the dough, the lighter and more tender your scones will be.
- Cut the scones straight down. Twisting the cutter seals the edges and prevents them from rising properly.
- Preheat your air fryer for even cooking.
- Don’t overcrowd the air fryer basket.
- Serve warm for the best flavor and texture.
- For extra flavor, add a handful of dried cranberries, raisins, or chocolate chips to the dough.
- You can freeze unbaked scones for up to 3 months. Freeze them on a baking sheet until solid, then transfer them to a freezer bag. Bake from frozen, adding a few extra minutes to the cooking time.
- If you don’t have self-raising flour, you can make your own by combining 1 cup of all-purpose flour with 1 ½ teaspoons of baking powder and ¼ teaspoon of salt.
Prep Time: 15 minutes
Cook Time: 14-18 minutes
Total Time: 29-33 minutes
Nutritional Information (per scone, approximate):
- Calories: 220
- Protein: 4g
- Sodium: 150mg
Conclusion
These air-fryer scones offer a delightful twist on a classic treat, delivering all the flavor and satisfaction of traditional scones with the added convenience and speed of the air fryer. Whether you’re a seasoned baker or just starting out, this recipe is sure to impress. So, go ahead, give it a try and experience the joy of warm, freshly baked scones in minutes!
Frequently Asked Questions:
Q1: Can I use a different type of flour?
A: While self-raising flour is ideal for scones, you can substitute it with all-purpose flour if you add extra baking powder. For every 175g of all-purpose flour, add 2 teaspoons of baking powder. Be sure to whisk the flour and baking powder together thoroughly to ensure even distribution.
Q2: My scones didn’t rise very much. What went wrong?
A: Several factors can contribute to scones not rising properly. Ensure your baking powder is fresh, as old baking powder loses its potency. Avoid overmixing the dough, as this can develop the gluten and prevent the scones from rising. Also, make sure your air fryer is preheated to the correct temperature. Finally, be gentle when handling the dough, and avoid twisting the cutter when cutting out the scones.
Q3: Can I make these scones ahead of time?
A: Yes, you can prepare the dough ahead of time and store it in the refrigerator for up to 24 hours. Wrap the dough tightly in plastic wrap to prevent it from drying out. Alternatively, you can freeze unbaked scones for up to 3 months. Bake them directly from frozen, adding a few extra minutes to the cooking time.
Q4: What can I substitute for buttermilk?
A: If you don’t have buttermilk, you can easily make a substitute by adding 1 tablespoon of lemon juice or white vinegar to 90ml of milk. Stir well and let it sit for 5 minutes before using. This will create a slightly tangy and acidic liquid that mimics the properties of buttermilk.
Q5: Can I add other ingredients to the dough?
A: Absolutely! Feel free to customize your scones by adding a variety of ingredients to the dough. Some popular additions include dried cranberries, raisins, chocolate chips, lemon zest, or even a sprinkle of cinnamon. Just be sure not to add too many wet ingredients, as this can affect the consistency of the dough.