Description of this recipe: This recipe transforms the classic comfort of banana bread into an air-fryer delight. It’s quicker than traditional oven baking and yields a moist, flavorful loaf with a beautifully browned crust.
Why you will love this recipe: Air-fryer banana bread is a game-changer for busy bakers. It’s incredibly easy to make, significantly faster than oven-baked banana bread, and delivers a perfectly cooked loaf with a delightful texture. The air fryer’s even heat circulation ensures uniform baking, preventing soggy middles and burnt edges. Plus, clean-up is a breeze! The added pecans and chocolate chips elevate this recipe to a truly special treat, perfect for breakfast, brunch, or an afternoon snack.
Introduction:
Banana bread. The very name conjures images of cozy kitchens, the comforting aroma of warm spices, and the satisfaction of transforming overly ripe fruit into something truly delicious. For generations, it’s been a staple in homes around the world, a testament to its simple ingredients and undeniable appeal. Now, imagine taking that beloved classic and giving it a modern, time-saving twist. Enter: Air-Fryer Banana Bread.
The air fryer, once a novelty kitchen gadget, has firmly established itself as an indispensable tool for the modern cook. Its ability to mimic the effects of deep-frying with significantly less oil, and its speedier cooking times, have made it a favorite for everything from crispy chicken wings to perfectly roasted vegetables. And now, it’s time to discover its potential for baking.
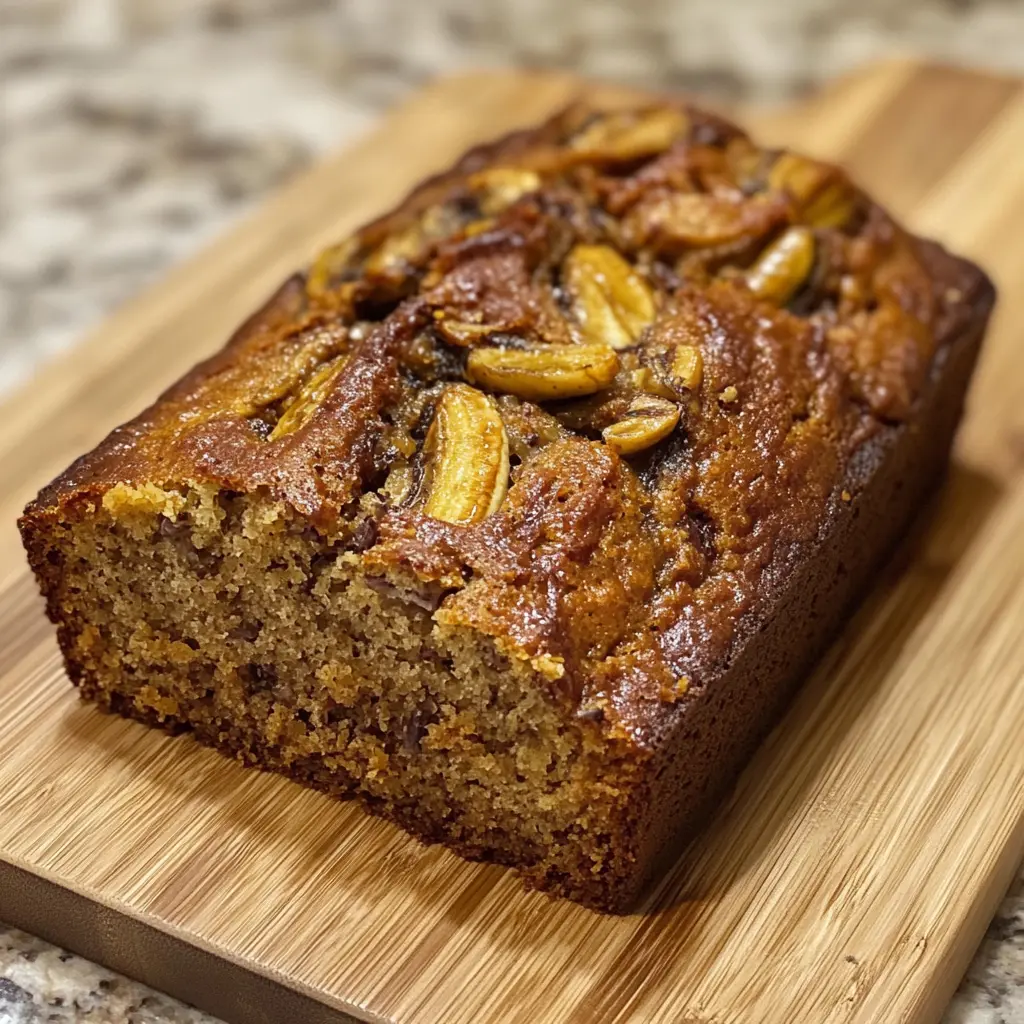
This recipe harnesses the power of the air fryer to create a banana bread that is as delicious as it is convenient. The air fryer’s consistent and circulating heat cooks the bread evenly, preventing the dreaded soggy center that can sometimes plague oven-baked versions. The result is a moist, tender loaf with a beautifully browned exterior, all achieved in significantly less time than a traditional oven bake.
Whether you’re a seasoned baker looking for a faster alternative or a novice eager to try your hand at bread-making, this Air-Fryer Banana Bread recipe is for you. With its simple ingredients, straightforward instructions, and guaranteed delicious results, it’s a recipe that will quickly become a favorite in your repertoire. So, gather your overripe bananas, preheat your air fryer, and get ready to experience the joy of homemade banana bread in a whole new way!
Ingredients:
- 150ml sunflower or vegetable oil, plus extra for greasing the tin
- 150g caster sugar
- 150g self-raising flour
- 1 tsp baking powder
- 2 large eggs
- 2 very ripe bananas, mashed
- 50g pecans, chopped (optional)
- 50g chocolate chips (optional)
Preparation:
Step 1: Prepare the Loaf Tin. Generously oil a 1-liter loaf tin using sunflower or vegetable oil. Ensure you coat all sides and corners. Then, line the tin with baking parchment, making sure the parchment overhangs the sides slightly. This will make it easier to lift the baked bread out of the tin later. Important Note: Before you even begin, verify that your loaf tin will fit comfortably inside your air fryer basket. If it’s too large, consider using a smaller loaf tin or even a muffin tin, adjusting the baking time accordingly. The success of this recipe depends on the tin fitting into the air fryer!
Step 2: Preheat the Air Fryer. Preheat your air fryer to 160°C (320°F). This is a crucial step, as it ensures that the bread cooks evenly from the start. Preheating allows the air fryer to reach the desired temperature, providing the optimal environment for baking. Most air fryers have a preheat function, which takes just a few minutes. If yours doesn’t, simply set it to 160°C and let it run for about 5 minutes before placing the loaf tin inside.
Step 3: Combine the Wet and Dry Ingredients. In a large mixing bowl, combine the sunflower or vegetable oil, caster sugar, self-raising flour, baking powder, and eggs. Use an electric mixer or a whisk to beat the ingredients together until they are well combined and the batter is smooth. Be careful not to overmix, as this can result in a tough bread.
Step 4: Mash the Bananas and Incorporate. In a separate bowl, mash the overripe bananas until they are smooth and almost liquid. This is where those brown, spotty bananas come in handy! The riper the bananas, the sweeter and more flavorful your bread will be. Add the mashed bananas to the batter and gently fold them in until they are evenly distributed.
Step 5: Add Pecans and Chocolate Chips (Optional). If you’re using pecans and chocolate chips, now is the time to add them. Gently fold in half of the chopped pecans and all of the chocolate chips into the batter. Reserve the remaining pecans for topping the loaf.
Step 6: Pour into the Prepared Tin and Top. Pour the batter into the prepared loaf tin, ensuring it’s evenly distributed. Sprinkle the remaining chopped pecans over the top of the batter. These pecans will add a delightful crunch and visual appeal to the finished loaf.
Step 7: Bake in the Air Fryer. Carefully place the loaf tin into the preheated air fryer basket. Bake for 45 minutes to 1 hour, or until a skewer inserted into the center of the bread comes out clean. Keep a close eye on the bread after 20 minutes, as air fryers can vary in their cooking times.
Step 8: Adjust Heat or Cover if Necessary. If the bread is browning too quickly on top, reduce the heat to 140°C (284°F) or cover the tin loosely with foil to prevent burning. This will allow the inside of the bread to cook through without the top becoming overly dark.
Step 9: Cool and Serve. Once the bread is cooked through, remove the loaf tin from the air fryer and let it cool on a wire rack for at least 15 minutes before slicing and serving. This allows the bread to firm up slightly, making it easier to slice.
COOKING Rating:
- Ease of Preparation: Easy
- Taste: Delicious
- Time Commitment: Moderate (mainly baking time)
- Kid-Friendly: Yes
- Overall: 5/5 Stars
Serving Suggestions:
- Serve warm with a pat of butter or a drizzle of honey.
- Enjoy it as a breakfast treat alongside a cup of coffee or tea.
- Toast a slice and spread it with cream cheese or peanut butter.
- Make it a dessert by serving it with a scoop of vanilla ice cream.
- Pack a slice in a lunchbox for a satisfying snack.
Tips:
- For the best flavor, use very ripe bananas – the riper, the better!
- Don’t overmix the batter, as this can result in a tough bread.
- If your air fryer tends to brown quickly, lower the temperature or cover the loaf with foil during the last part of baking.
- Store leftover banana bread in an airtight container at room temperature for up to 3 days or in the refrigerator for up to a week.
- For a richer flavor, try using brown sugar instead of caster sugar.
- Experiment with different add-ins, such as walnuts, dried cranberries, or shredded coconut.
- If you don’t have self-raising flour, you can make your own by adding 2 teaspoons of baking powder per cup of plain flour.
- To ensure even cooking, avoid overcrowding the air fryer basket. If necessary, bake the bread in two batches.
- Always check the manufacturer’s instructions for your specific air fryer model, as cooking times may vary.
Prep Time: 15 minutes
Cook Time: 45-60 minutes
Total Time: 1 hour – 1 hour 15 minutes
Nutritional Information: (Approximate, per slice, assuming 12 slices)
Calories: 250-300
Protein: 3-4g
Sodium: 150-200mg
Conclusion:
This Air-Fryer Banana Bread recipe is a testament to the power of simple ingredients and innovative cooking methods. It’s a quick, easy, and delicious way to enjoy a classic comfort food, perfect for any occasion. Whether you’re craving a warm slice for breakfast, a sweet treat for dessert, or a satisfying snack on the go, this recipe is sure to deliver. The air fryer’s efficiency and consistent heat ensure a perfectly baked loaf every time, saving you time and effort without compromising on taste or texture. So, embrace the convenience of the air fryer and discover the joy of homemade banana bread in a whole new light. You’ll be amazed at how easy and delicious it is! Enjoy!
Questions and Answers:
Q1: Can I use frozen bananas for this recipe?
A1: Absolutely! In fact, using frozen bananas is a great way to ensure you always have the key ingredient on hand. Simply thaw the frozen bananas completely before mashing them. You might notice that thawed bananas tend to be a bit more watery than fresh ones. If this is the case, you can drain off some of the excess liquid before adding them to the batter to prevent the bread from becoming too moist. Freezing and thawing ripe bananas intensifies their sweetness and flavor, making them an excellent choice for banana bread. Just remember to measure the mashed bananas accurately to maintain the proper batter consistency.
Q2: My air fryer tends to burn things easily. What can I do to prevent the banana bread from burning?
A2: Air fryers can indeed be a bit temperamental, especially regarding temperature control. If you’ve experienced burning issues with your air fryer, there are several steps you can take to prevent your banana bread from suffering the same fate. First, double-check the accuracy of your air fryer’s temperature settings. Some air fryers run hotter than indicated. Second, as the recipe suggests, keep a close eye on the bread after the first 20 minutes. If the top is browning too quickly, reduce the temperature by 20°C (about 35°F). A third effective technique is to loosely cover the loaf tin with aluminum foil during the last half of the baking time. This will shield the top of the bread from direct heat, allowing the inside to cook through without burning the surface. Also, ensure that your loaf tin isn’t positioned too close to the heating element in your air fryer. If your air fryer has multiple rack positions, try placing the loaf tin on a lower rack.
Q3: Can I substitute the self-raising flour with all-purpose flour?
A3: While self-raising flour is ideal for this recipe, you can definitely substitute it with all-purpose flour. However, you’ll need to add a leavening agent to ensure the bread rises properly. For every 150g of all-purpose flour, add 2 teaspoons of baking powder. Mix the baking powder thoroughly with the flour before adding it to the wet ingredients. This will ensure even distribution and optimal rising. Keep in mind that the texture of the bread might be slightly different when using all-purpose flour with baking powder compared to self-raising flour. The self-raising flour tends to produce a slightly lighter and more airy crumb. However, the difference should be minimal, and your banana bread will still be delicious.
Q4: I don’t have pecans or chocolate chips. Can I still make the recipe without them, or are there other substitutions I can use?
A4: Absolutely! The pecans and chocolate chips are optional additions and don’t affect the fundamental structure of the banana bread. You can certainly make the recipe without them and still enjoy a delicious loaf. As for substitutions, the possibilities are endless! You could use chopped walnuts, almonds, or any other nuts you prefer. Dried fruits like cranberries, raisins, or chopped dates would also be a wonderful addition. For a different flavor profile, consider adding a teaspoon of cinnamon or nutmeg to the batter. You could even add a swirl of peanut butter or Nutella for a decadent twist. Feel free to get creative and customize the recipe to suit your taste preferences. The key is to maintain a similar volume of add-ins (about 50-100g total) to ensure the batter consistency remains balanced.
Q5: My banana bread came out a bit dense and gummy. What could have gone wrong?
A5: A dense and gummy texture in banana bread can be caused by a few different factors. One common culprit is overmixing the batter. Overmixing develops the gluten in the flour, resulting in a tougher texture. When combining the wet and dry ingredients, mix just until they are combined. Stop as soon as you no longer see streaks of flour. Another possibility is that the bananas weren’t ripe enough. Overripe bananas contribute to the moisture and sweetness of the bread, helping to create a tender crumb. Make sure your bananas are very ripe – almost black – before using them. Lastly, ensure that your baking powder is fresh. If your baking powder is old, it may not provide enough leavening power, resulting in a dense loaf. You can test the freshness of your baking powder by adding a teaspoon of it to a cup of hot water. If it fizzes vigorously, it’s still good to use. If not, it’s time to replace it. Also ensure correct temperature, lower is always better to ensure cooking, while avoiding burning.