

Why You Will Love This Recipe
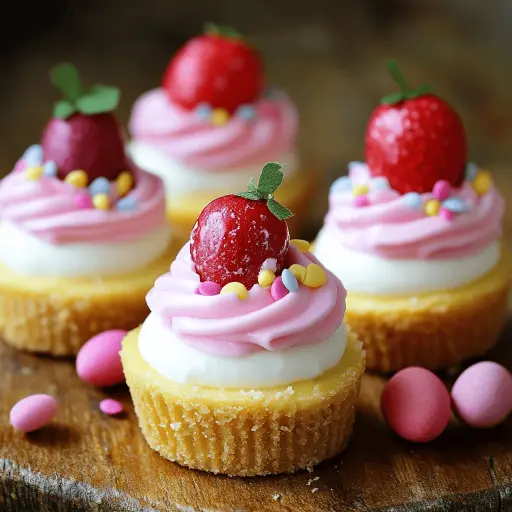
What makes these mini cheesecakes so special is their combination of flavors and textures. The crunchy graham cracker crust perfectly complements the rich and creamy cheesecake filling, while the pink white chocolate topping adds a touch of sweetness and a pop of color. Additionally, the mini size makes them perfect for portion control, allowing everyone to indulge without overdoing it. They are easy to make and can be prepared ahead of time, freeing you up to enjoy the holiday festivities with your loved ones.
Ingredients:
For the Crust:
- 1 1/2 cups graham cracker crumbs
- 1/4 cup unsalted butter, melted
- 2 tablespoons sugar
For the Cheesecake Filling:
- 8 oz cream cheese, softened
- 1/2 cup powdered sugar
- 1 teaspoon vanilla extract
- 1 cup heavy whipping cream
For the Topping:
- 1/2 cup white chocolate, melted
- Pink food coloring
- Easter sprinkles
- Mini candy eggs (like Cadbury Mini Eggs)
Preparation:
Step 1: Prepare the Crust
Begin by preparing the crust for your mini cheesecakes. In a mixing bowl, combine the graham cracker crumbs, melted unsalted butter, and sugar. Stir until the mixture is well combined and resembles wet sand. This step is crucial as it forms the base of your cheesecakes. Once mixed, take a greased mini cheesecake pan or muffin liners and evenly press the mixture into the bottoms. It’s important to pack the crust tightly to ensure it holds its shape when you remove the cheesecakes later. After pressing the crusts down, place the pan in the refrigerator to chill while you prepare the cheesecake filling.
Step 2: Make the Cheesecake Filling
Next, it’s time to create the luscious cheesecake filling. In a large mixing bowl, add the softened cream cheese, powdered sugar, and vanilla extract. Using an electric mixer, beat the mixture on medium speed until it becomes smooth and creamy. This should take about 2-3 minutes. The key to a perfect filling is ensuring there are no lumps in the cream cheese. In a separate bowl, whip the heavy cream until stiff peaks form. This step adds lightness and fluffiness to your cheesecake filling. Gently fold the whipped cream into the cream cheese mixture using a spatula, being careful not to deflate the whipped cream. Once combined, your filling should be light and airy.
Step 3: Fill the Cheesecakes
Now that your filling is ready, it’s time to assemble the mini cheesecakes. Remove the crust from the refrigerator and use a spoon or piping bag to fill each crust with the cheesecake mixture. Smooth the tops with a spatula or the back of a spoon for an even finish. The filling should be heaped slightly above the crust, as it will settle a bit while chilling. Once all the crusts are filled, return the pan to the refrigerator to allow the cheesecakes to set.
Step 4: Add the Topping
While the cheesecakes are chilling, prepare the delightful topping. In a microwave-safe bowl, melt the white chocolate in short bursts, stirring in between to avoid burning. Once melted, add a few drops of pink food coloring and stir until you achieve a lovely pastel shade. This will give your cheesecakes a festive touch. Carefully spread a thin layer of the pink white chocolate over each cheesecake, allowing it to drizzle slightly down the sides for an appealing look.
Step 5: Decorate and Chill
To finish off your Easter mini cheesecakes, it’s time to get creative! Sprinkle an assortment of Easter sprinkles over the top of the chocolate layer. Then, place a few mini candy eggs on top of each cheesecake for that perfect holiday touch. Once decorated, cover the pan with plastic wrap and return it to the refrigerator to chill for at least 2 hours. This chilling time allows the flavors to meld beautifully and ensures the cheesecakes hold their shape when served.
Serving Suggestions:
These mini cheesecakes are perfect for Easter gatherings, potlucks, or simply as a sweet treat to enjoy at home. Serve them on a decorative platter and garnish with fresh berries or edible flowers for an extra touch of elegance. Pair them with a cup of coffee or a glass of milk for a delightful dessert experience.
Tips:
- Make sure the cream cheese is at room temperature for easier mixing and a smoother filling.
- If you want to customize the flavor, consider adding lemon zest or a splash of almond extract to the cheesecake filling.
- For a chocolate twist, you can use chocolate graham crackers for the crust or swirl in some melted chocolate into the cheesecake filling before chilling.
- Store any leftover mini cheesecakes in an airtight container in the refrigerator for up to 3 days.
Prep Time: 20 minutes
Cook Time: 0 minutes (chill time only)
Total Time: 2 hours 20 minutes
Nutritional Information:
Calories: Approximately 250 per cheesecake
Protein: 3g
Sodium: 150mg
Conclusion
These Easy Mini Easter Cheesecakes are a delightful way to celebrate the holiday with a sweet treat that everyone will love. Their creamy texture, buttery crust, and festive decorations make them a standout dessert that’s both fun to make and to eat. Whether you’re hosting an Easter brunch or looking for a special dessert to share with family, these mini cheesecakes are sure to be a hit. So gather your ingredients, roll up your sleeves, and get ready to create a deliciously sweet masterpiece that will bring smiles to everyone’s faces.
Questions and Answers:
- Can I make these mini cheesecakes in advance?
Yes, you can prepare the cheesecakes a day ahead of time. Just make sure to keep them covered in the refrigerator until you’re ready to serve. - What can I substitute for the heavy whipping cream?
If you prefer a lighter option, you can use whipped topping instead of heavy whipping cream, but it may not be as rich. - How do I store leftovers?
Store any leftover mini cheesecakes in an airtight container in the refrigerator for up to 3 days. - Can I use different toppings?
Absolutely! Feel free to get creative with your toppings. Fresh fruit, chocolate shavings, or even a drizzle of caramel sauce would be delicious. - Is this recipe suitable for a gluten-free diet?
Yes, you can use gluten-free graham cracker crumbs to make the crust gluten-free. Just check the labels to ensure all other ingredients are also gluten-free.