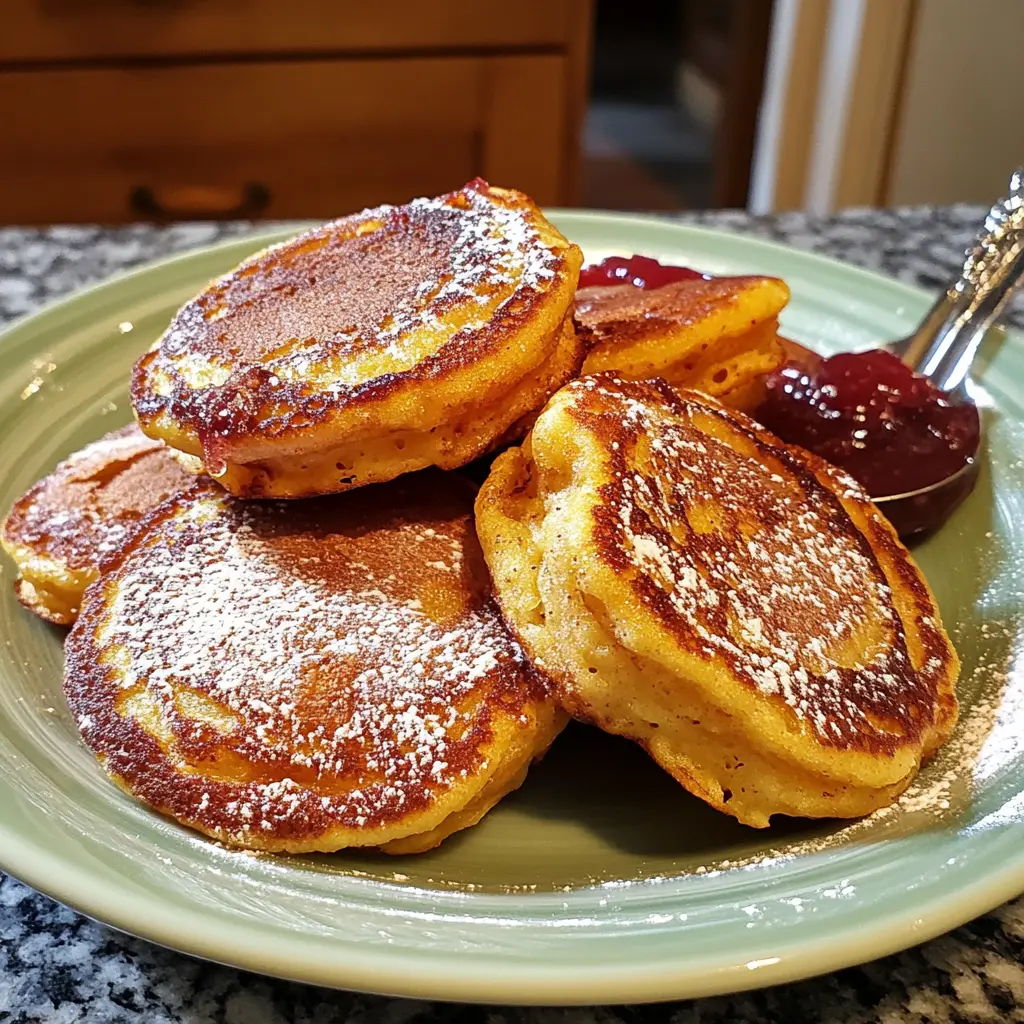
Description of this recipe
These Jam Doughnut Pancakes are a playful and delicious twist on classic pancakes, bringing the comforting flavors of a jam doughnut to your breakfast table. Fluffy, golden pancakes are filled with a sweet, gooey strawberry jam center and finished with a sprinkle of granulated sugar, creating a delightful treat that’s perfect for a weekend brunch or a special weekday morning.
Why you will love this recipe
- Fun and Nostalgic: This recipe captures the essence of a beloved childhood treat in a fun and exciting way, making breakfast feel like a special occasion.
- Easy to Make: With simple ingredients and straightforward instructions, these pancakes are surprisingly easy to whip up, even for novice cooks.
- Crowd-Pleasing: The combination of fluffy pancakes and sweet jam filling is sure to be a hit with both kids and adults alike, making it a perfect recipe for family gatherings or brunch parties.
- Customizable: While this recipe features strawberry jam, you can easily substitute it with your favorite flavor, such as raspberry, blueberry, or even a dollop of Nutella for a chocolatey twist.
- Perfectly Sweet: The addition of caster sugar to the batter and the sprinkle of granulated sugar at the end provide just the right amount of sweetness, making these pancakes a truly irresistible indulgence.
Introduction
Who doesn’t love a good jam doughnut? The soft, pillowy dough, the burst of sweet jam in the center, and the sugary coating – it’s a symphony of flavors and textures that’s hard to resist. This recipe takes all those wonderful elements and transforms them into a stack of fluffy, golden pancakes. Imagine biting into a pancake that’s not only light and airy but also has a hidden pocket of warm, gooey strawberry jam. Then, imagine it’s all topped off with a generous sprinkle of sparkling granulated sugar. Sounds dreamy, right?
These Jam Doughnut Pancakes are more than just a breakfast dish; they’re an experience. They’re a way to bring a little bit of joy and nostalgia to your mornings. They’re a conversation starter, a memory maker, and a guaranteed crowd-pleaser. So, gather your ingredients, put on some upbeat music, and get ready to create a batch of pancakes that will have everyone asking for seconds.
Ingredients:
- 2 large eggs
- 300ml milk (whole or semi-skimmed)
- 250g self-raising flour
- 2 tsp baking powder
- 25g caster sugar
- 50g unsalted butter, melted, plus extra for frying
- 12 tsp (about 75g) strawberry jam (or your favorite flavor)
- Granulated sugar, to serve
Preparation:
Step 1: In a jug or medium sized bowl, whisk together the eggs and milk until well combined and smooth. This mixture forms the liquid base for your pancake batter. Ensure there are no streaks of egg yolk remaining. A smooth mixture ensures a consistent pancake batter.
Step 2: In a large bowl, whisk together the flour, baking powder, and a pinch of salt. The flour provides the structure for the pancakes, while the baking powder ensures they rise and become light and fluffy. A pinch of salt enhances the other flavors and balances the sweetness.
Step 3: Gently pour the egg mixture into the dry ingredients (flour, baking powder, salt) and stir until just combined. It’s important not to overmix the batter, as this can result in tough pancakes. A few lumps are perfectly fine. Stir in the caster sugar.
Step 4: Add the melted butter to the batter and stir until it’s evenly incorporated. The melted butter adds richness and moisture to the pancakes.
Step 5: Allow the batter to rest for 30 minutes, or proceed with cooking immediately. Resting the batter allows the gluten in the flour to relax, resulting in a more tender pancake. However, if you’re short on time, you can skip this step without significantly impacting the final result.
Step 6: Melt a generous knob of butter in a large non-stick frying pan or griddle over medium heat. The butter prevents the pancakes from sticking and adds a delicious golden-brown crust. Ensure the pan is evenly heated before adding the batter.
Step 7: Once the butter is frothy, pour a ladleful of batter onto the hot surface for each pancake you wish to cook.
Step 8: Cook each pancake for about 30 seconds before spooning about 2 tsp of jam onto the middle of the pancake, spreading it slightly, if desired, leaving room around the edges. Using two spoons will help with this process.
Step 9: Ladle over enough batter to cover the jam filling, creating a jam-filled centre. The batter should encapsulate the jam without excessive spreading.
Step 10: Cook the pancakes on one side for 2 minutes until bubbles appear on the surface and the edges begin to set. This indicates that the underside is cooked and ready to be flipped.
Step 11: Gently flip the pancakes with a spatula or fish slice and cook for a further 1-2 minutes until golden brown on the other side and the jam is heated through. The cooking time may vary depending on the heat of your pan, so keep an eye on them to prevent burning.
Step 12: Repeat with the rest of the batter, adding more butter to the pan as needed. Wipe out the pan between each pancake to avoid any burnt bits from accumulating.
Step 13: Transfer the cooked pancakes to a plate and sprinkle generously with granulated sugar. Serve immediately and enjoy!
COOKING Rating:
Easy
Serving Suggestions:
- Classic Stack: Serve the pancakes stacked high on a plate, drizzled with a little extra melted butter and a generous sprinkle of granulated sugar.
- Fruity Topping: Add a dollop of whipped cream or Greek yogurt and some fresh berries for a burst of freshness and flavor.
- Chocolate Drizzle: Drizzle with melted chocolate or a chocolate sauce for an extra indulgent treat.
- Ice Cream Sundae: Turn your pancakes into a dessert by topping them with a scoop of vanilla ice cream and a drizzle of caramel sauce.
- Savory Pairing: For a more balanced meal, serve the pancakes with a side of crispy bacon or sausage.
Tips:
- Don’t Overmix: Overmixing the batter will result in tough pancakes. Mix just until the ingredients are combined.
- Hot Pan is Key: Ensure your pan is hot before adding the batter for perfectly golden-brown pancakes.
- Adjust the Heat: Adjust the heat as needed to prevent burning. If the pancakes are browning too quickly, lower the heat.
- Keep Warm: Keep cooked pancakes warm in a low oven (200°F or 95°C) while you finish cooking the rest of the batch.
- Make Ahead: The batter can be made ahead of time and stored in the refrigerator for up to 24 hours.
Prep Time:
10 minutes
Cook Time:
20-25 minutes
Total Time:
30-35 minutes
Nutritional Information:
(Note: Nutritional information is an estimate and may vary based on specific ingredients and portion sizes.)
Calories: Approximately 350-400 per serving (2 pancakes)
Protein: Approximately 8-10g per serving
Sodium: Approximately 300-400mg per serving
Conclusion
These Jam Doughnut Pancakes are a delightful way to start your day or to celebrate a special occasion. They’re easy to make, customizable to your favorite flavors, and guaranteed to bring a smile to everyone’s face. So, go ahead and give this recipe a try. You might just find yourself making them again and again!
Questions and Answers:
Q1: Can I use a different type of jam?
A1: Absolutely! Strawberry jam is a classic choice that complements the doughnut flavor, but you can easily substitute it with your favorite flavor. Raspberry, blueberry, apricot, or even a citrus marmalade would all be delicious options. For a decadent twist, you could even use a hazelnut spread like Nutella. The key is to choose a jam that you enjoy and that has a relatively thick consistency so it doesn’t seep out of the pancakes too much.
Q2: What if I don’t have self-raising flour? Can I still make this recipe?
A2: Yes, you can still make these pancakes without self-raising flour. Simply use plain (all-purpose) flour and add 1 teaspoon of baking powder per cup of flour used. In this recipe, you would use 250g of plain flour plus 2 teaspoons baking powder. Make sure to whisk the flour and baking powder together thoroughly before adding them to the wet ingredients to ensure even distribution.
Q3: My pancakes are burning on the outside but still raw in the middle. What am I doing wrong?
A3: This usually indicates that your pan is too hot. Lower the heat to medium-low and allow the pan to heat up more gently. You may also need to cook the pancakes for a longer time on each side. Another trick is to cover the pan with a lid for a minute or two while the pancakes are cooking to help them cook through more evenly.
Q4: Can I make the batter ahead of time and store it in the refrigerator?
A4: Yes, you can make the batter ahead of time and store it in the refrigerator for up to 24 hours. This can be a great time-saver if you’re preparing breakfast for a crowd or want to get a head start on your weekend brunch. Just be sure to give the batter a good stir before using it, as it may thicken slightly while it sits.
Q5: Can I freeze these pancakes?
A5: Yes, you can freeze these pancakes! Allow the pancakes to cool completely. Then, place them in a single layer on a baking sheet lined with parchment paper and freeze for about 30 minutes to prevent them from sticking together. Once they’re frozen solid, transfer them to a freezer-safe bag or container. They can be stored in the freezer for up to 2-3 months. To reheat, simply toast them in a toaster or heat them in a microwave until warmed through. You can also reheat them in a preheated oven at 350°F (175°C) for about 10-15 minutes.