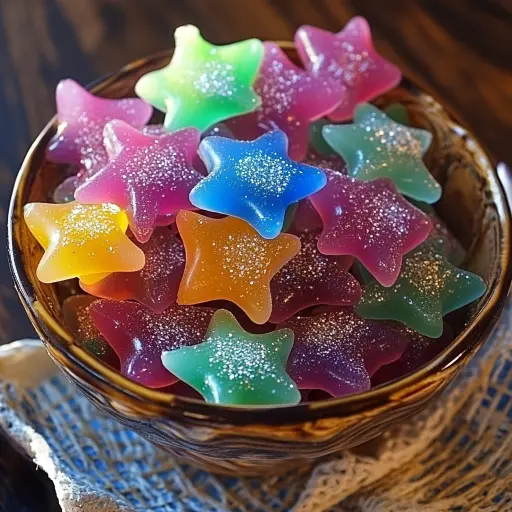

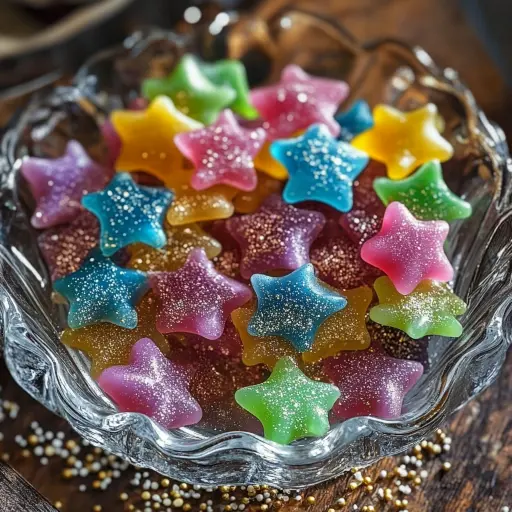
Why You Will Love This Recipe
You will love this Magic Candy recipe for its simplicity and the joy it brings to any gathering. It’s easy to make with just a few ingredients, and the process of watching the sugar transform into a beautiful candy is nothing short of magical. Whether you’re hosting a party, celebrating a holiday, or just looking for a fun activity to do with the kids, this candy is sure to become a favorite. Plus, you can customize it with different colors and toppings to fit any theme or occasion!
Introduction
Candy-making can often seem like a daunting task reserved for seasoned bakers, but this Magic Candy recipe proves that anyone can create stunning confections at home. With just a handful of ingredients and a little patience, you can whip up a batch of this sweet treat that will have everyone asking for more. The process is straightforward, and the results are nothing short of spectacular.
The key to this recipe is reaching the right temperature when cooking the sugar mixture. This ensures that the candy hardens to the perfect consistency, giving it that delightful crunch that makes it so enjoyable to eat. Plus, the addition of vanilla and butter adds a rich flavor that complements the sweetness beautifully.
Ingredients:
- 2 cups granulated sugar
- 1/2 cup corn syrup
- 1/4 cup water
- 1/4 teaspoon salt
- 1/2 teaspoon vanilla extract
- 1/4 teaspoon baking soda
- 1 tablespoon butter
- Food coloring (optional)
- Edible glitter or sprinkles (optional, for extra sparkle)
Preparation:
Step 1: Line a baking sheet with parchment paper and set it aside. This will prevent the candy from sticking and make clean-up a breeze.
Step 2: In a medium saucepan, combine the granulated sugar, corn syrup, water, and salt. Stir the mixture over medium heat until the sugar dissolves completely. This step is crucial to avoid any graininess in your final candy.
Step 3: Bring the mixture to a boil and allow it to cook for 5-7 minutes without stirring. Use a candy thermometer to monitor the temperature, aiming for 300°F (150°C). This is the hard crack stage, which is essential for achieving that perfect candy texture.
Step 4: Once the mixture reaches the desired temperature, remove the saucepan from the heat. Quickly stir in the vanilla extract, butter, and baking soda. If you’re using food coloring, add a few drops now and mix until well incorporated. The baking soda will cause the mixture to bubble and foam slightly, which is normal.
Step 5: Pour the hot candy mixture onto the prepared baking sheet. Allow it to spread naturally for a rustic look, or use a spatula to gently spread it out to your desired thickness. If you want to add edible glitter or sprinkles, do so once the candy starts to set, about 5 minutes after pouring.
Allow the candy to cool completely before breaking it into pieces and serving. The cooling process can take around 30 minutes to an hour, depending on the thickness of your candy.
Serving Suggestions:
Serve your Magic Candy as a standalone treat, or use it as a decorative element for cakes and cupcakes. You can also package it in clear bags tied with ribbons for a thoughtful homemade gift. Pair it with hot chocolate or a scoop of vanilla ice cream for an indulgent dessert experience.
Tips:
- Make sure to use a candy thermometer for accurate temperature readings, as this is crucial for achieving the right texture.
- If you want to make a batch with different colors, divide the mixture into separate bowls after adding the vanilla and butter, then add different colors to each bowl.
- Store any leftover candy in an airtight container to keep it fresh and crunchy.
Prep Time: 10 minutes
Cook Time: 10 minutes
Total Time: 1 hour (including cooling time)
Nutritional Information (per serving, based on 12 servings):
- Calories: 150
- Protein: 0g
- Sodium: 15mg
Conclusion
This Magic Candy recipe is a delightful way to bring a touch of sweetness and creativity into your kitchen. With its simple ingredients and easy preparation, it’s perfect for candy-making novices and seasoned bakers alike. Whether you enjoy it as a treat or use it to brighten up your desserts, this candy is sure to become a staple in your recipe repertoire. So gather your ingredients, roll up your sleeves, and let the magic begin!
Questions and Answers
1. Can I use different flavors instead of vanilla?
Yes! You can experiment with different extracts like almond, peppermint, or lemon to create unique flavor profiles for your Magic Candy.
2. How do I store leftover candy?
Store the candy in an airtight container at room temperature. Avoid refrigerating it, as this can cause it to become sticky.
3. What can I use instead of corn syrup?
You can substitute corn syrup with light agave syrup or homemade sugar syrup, but keep in mind that this may slightly alter the texture and flavor.
4. Can I make this candy without food coloring?
Absolutely! The candy is delicious on its own without any coloring. However, adding color can make it visually appealing for special occasions.
5. How long does the candy last?
When stored properly, the Magic Candy can last for up to two weeks. Just make sure it is kept in a cool, dry place to maintain its crunchiness.